How to Install Mobile Presets
Before We Get Started, Please make sure you have the Lightroom CC mobile app installed. You can download it from your App Store or Google Play for free.
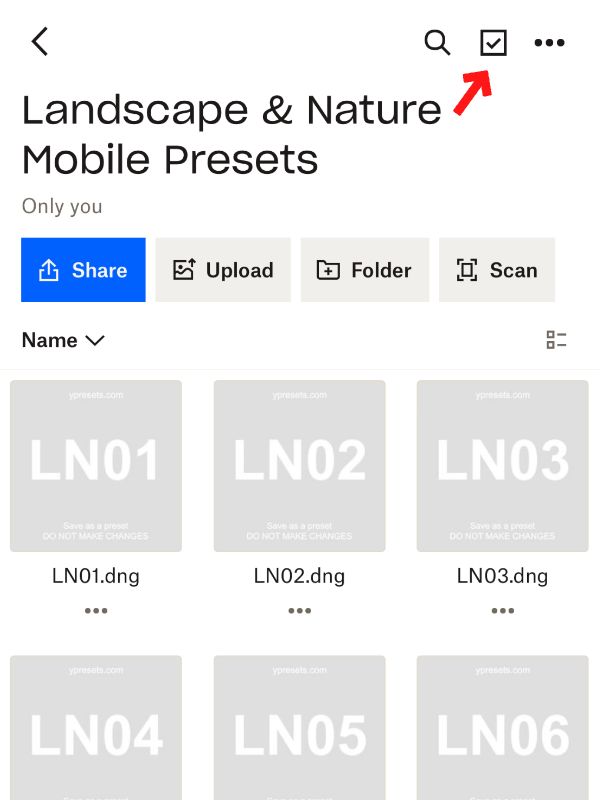
Export The Mobile Presets From The Dropbox Folder
Select all files (.dng)
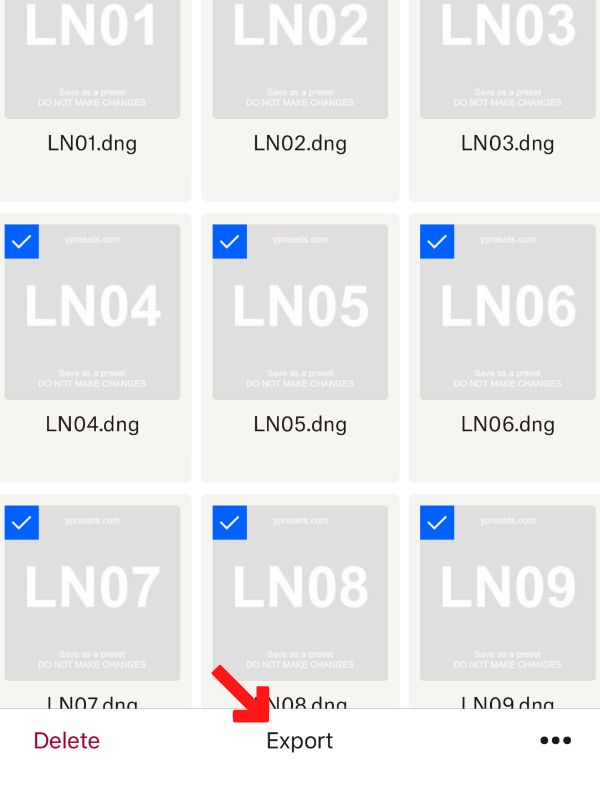
Select 'Export'
Select 'Export'
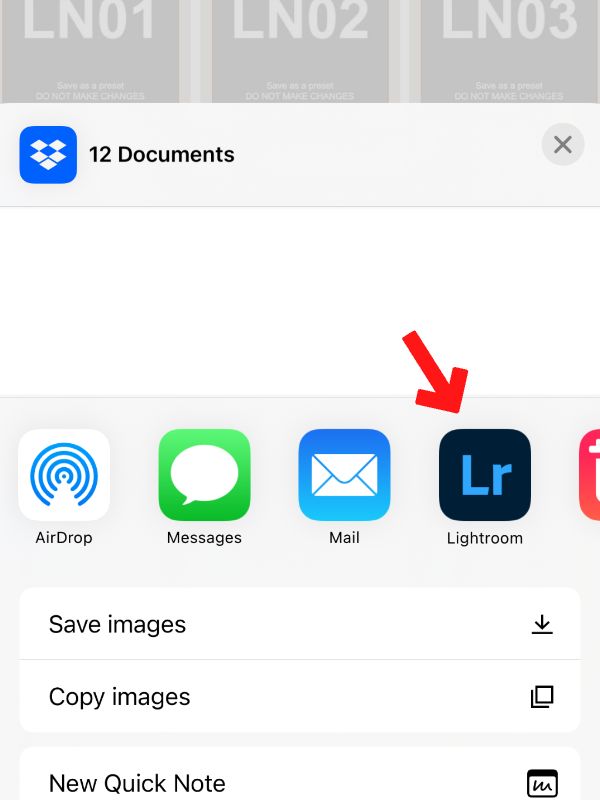
Export to Lightroom app
Make sure you already have the Lightroom mobile app installed. If you do not see the Lightroom icon, then scroll to the right and tap 'more'.
Note: If you don't see this option, try manually save all the images (.dng files) on your phone first, and then import them into the Lightroom Mobile app. Instruction here

They should look like this once all the preset files have been imported.
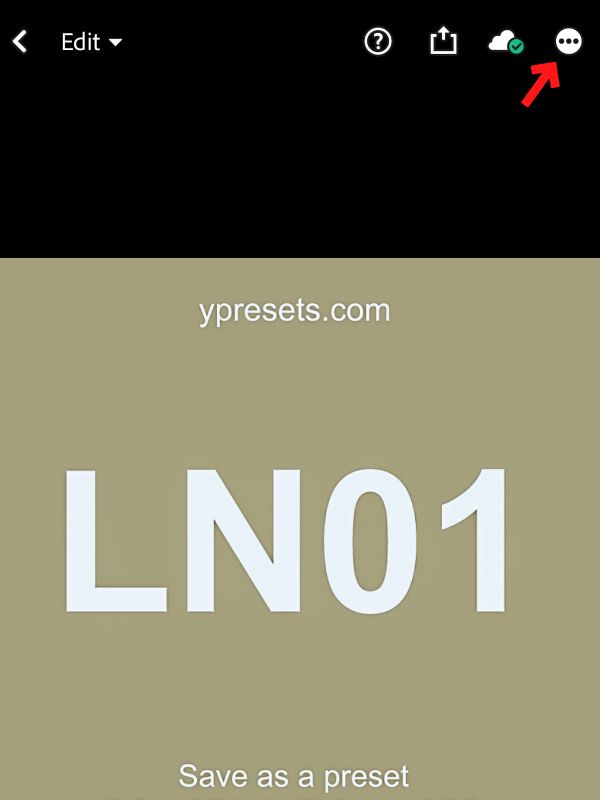
Create Presets
Now you will need to do this for each file/preset, but the good news is that you only need to do it once.
Tap the option icon
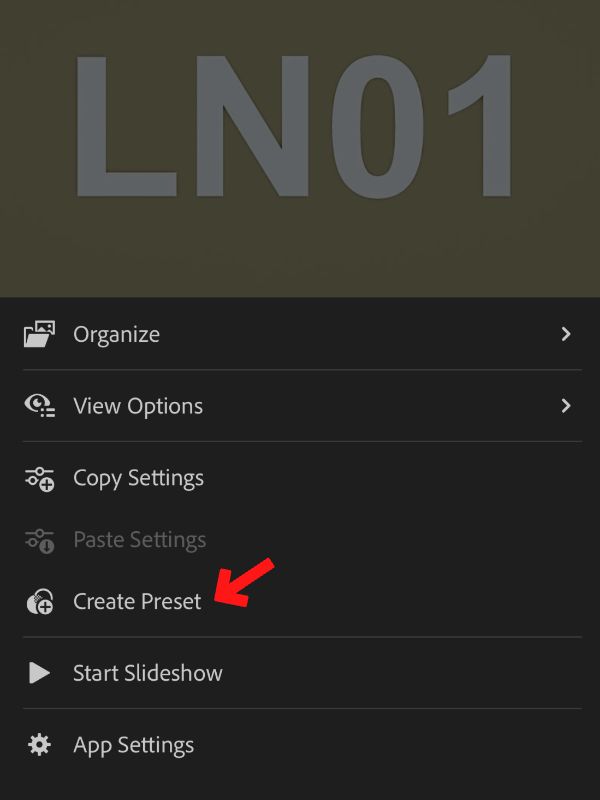
Tap “create preset”
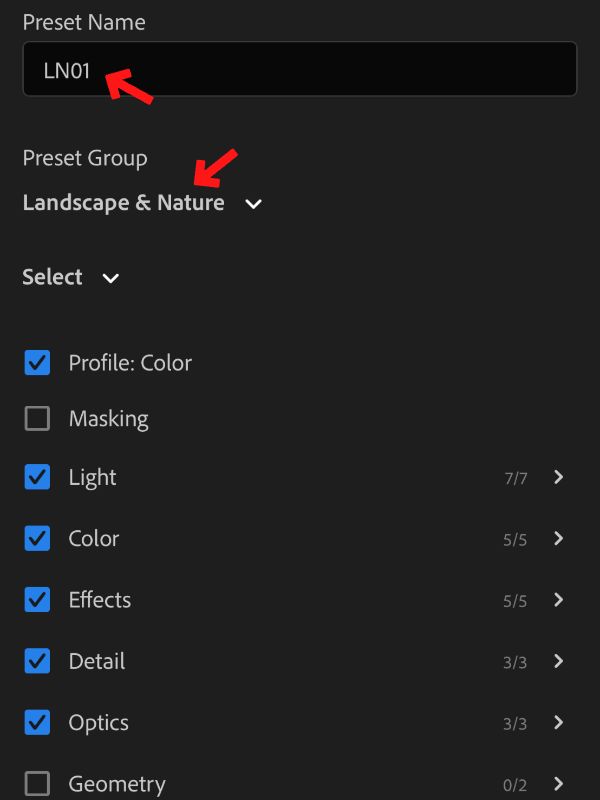
Create mobile presets
1. Type in the preset name, make sure it is the same as file name eg. TL01, LN03 etc
2. Create a new Preset group, and name it the preset collection you’ve got, in this case it’s called “Landscape & Nature”. You only need to do this once, as the rest of the collection will be put in this group.
3. Select “ALL”
4. Done. Now you’ve successfully created one preset. Please repeat this step and finish creating the rest of the collection.
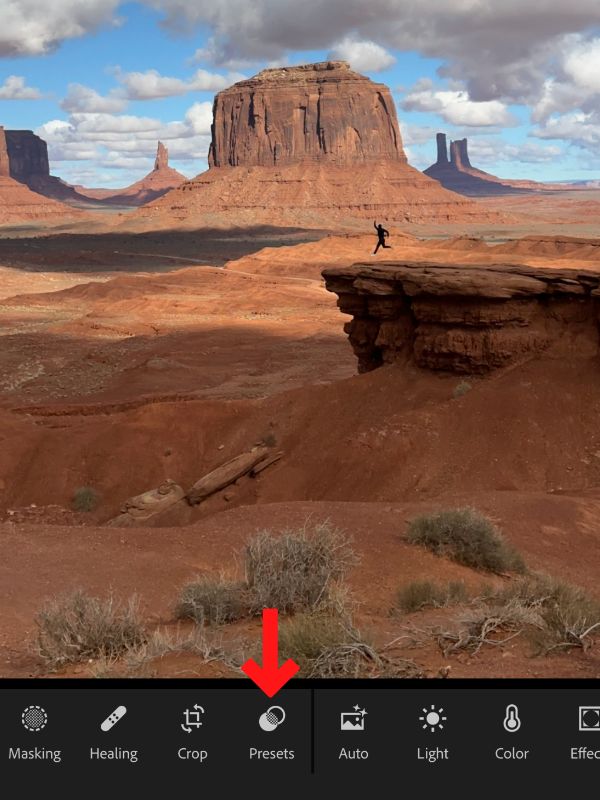
Congratulations! You’ve Successfully Imported All The Presets. Now You Can Apply The Presets To Your Photos.
Pick a photo, and tap “Presets”
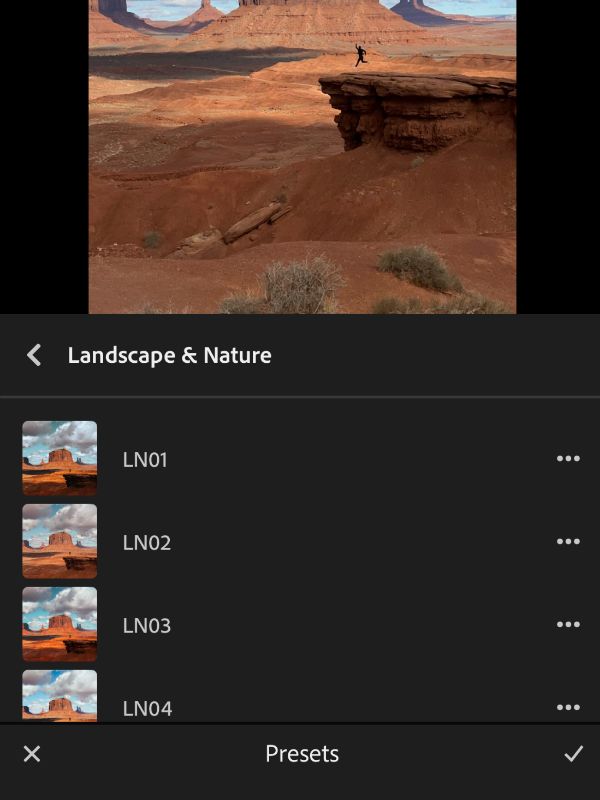
Try each preset
Under the new group you just created, go through all the presets until you find the one that you like.
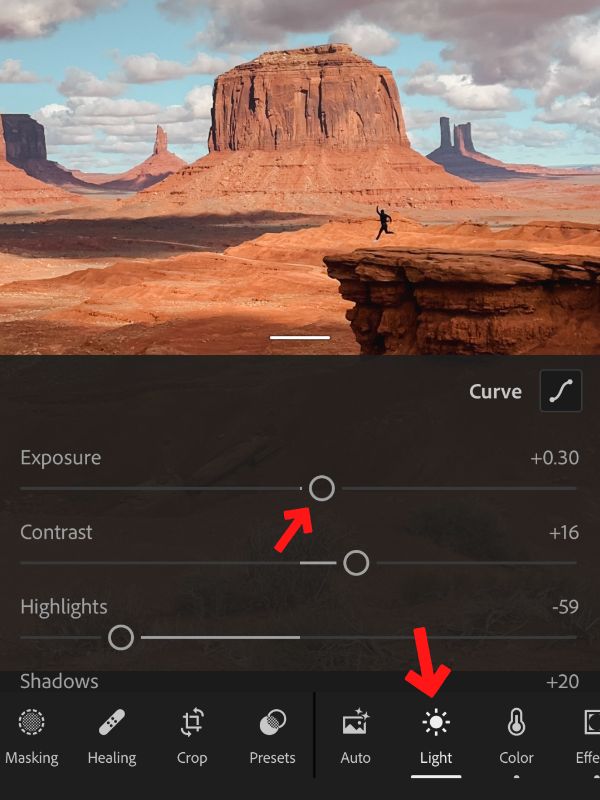
Simple adjustments
If the photo turns out too bright or too dark, just tap the 'Light' menu, and move the 'Exposure' dial.
Export The Mobile Presets From The Dropbox Folder
Select all files (.dng)
Select 'Export'
Select 'Export'
Export to Lightroom app
Make sure you already have the Lightroom mobile app installed. If you do not see the Lightroom icon, then scroll to the right and tap 'more'.
Note: If you don't see this option, try manually save all the images (.dng files) on your phone first, and then import them into the Lightroom Mobile app. Instruction here
They should look like this once all the preset files have been imported.
Create Presets
Now you will need to do this for each file/preset, but the good news is that you only need to do it once.
Tap the option icon
Tap “create preset”
Create mobile presets
1. Type in the preset name, make sure it is the same as file name eg. TL01, LN03 etc
2. Create a new Preset group, and name it the preset collection you’ve got, in this case it’s called “Landscape & Nature”. You only need to do this once, as the rest of the collection will be put in this group.
3. Select “ALL”
4. Done. Now you’ve successfully created one preset. Please repeat this step and finish creating the rest of the collection.
Congratulations! You’ve Successfully Imported All The Presets. Now You Can Apply The Presets To Your Photos.
Pick a photo, and tap “Presets”
Try each preset
Under the new group you just created, go through all the presets until you find the one that you like.
Simple adjustments
If the photo turns out too bright or too dark, just tap the 'Light' menu, and move the 'Exposure' dial.


